How to re-image CallPilot
1Before starting:
- Locate CallPilot installation CD's/DVD, and keycode sheet
(keycode and IP addresses are required in the Configuration Wizard) - Perform a 'Full System Backup', preferably to a USB stick, or...
- If CallPilot is down, locate the most recent 'Full System Backup'
Note: Replacing a spinning hard drive with an SSD (eg, WD 512GB SATA) yields a huge performance improvement!
2 Depending on your CallPilot system, you will need to hook up:
- Keyboard, monitor, mouse (USB or PS2)
- CD-ROM/DVD drive (USB or SCSI)
- Tape drive (USB or SCSI)
- 202i: USB only
- 201i: PS/2 and SCSI
- 600r: PS/2, USB and SCSI
3 Boot CallPilot from the image#1 CD, or image DVD. It may be necessary to alter the BIOS boot options (F2 or Del) to do this. If CallPilot will not boot from the disk:
- Watch the boot process, and wait for: BOOT ROM DOS (Y/N)? - press "Y" and ENTER
- At the DOS prompt, change the drive letter to "Z"
- Insert the first disk (disk 1) of the re-image CD's
- Now type "image.bat" (or other batch file name)
4 Follow the on-screen prompts:
- You are NOT upgrading from an older installation, so answer N at the prompt
- When prompted if you want to continue, enter Y to proceed with the installation
5 The re-image will take about 25 minutes. Feed CD-ROM disks 2 and 3 as prompted (newer systems have one DVD).
- Don't forget to restore the default BIOS settings if you changed the boot option to CDROM
6 CallPilot will re-boot several times during the installation process. BE PATIENT!
- DO NOT TRY AND LOG IN until the installation process has completely finished.
7 When the login screen finally appears, log in as Administrator, and start configuration.
Password: abc123
Password: Bvw_250!#
Password: Bvw250
Password: 124578
8 On the first login after re-imaging, the Setup Wizard will run...
Within the Setup Wizard you can:
- Install Service Updates and PEP's:
- Install the Service Update (SU) first, don't reboot, install the PEP file(s) after, reboot.
- Perform a "Platform Validity Check"
- Optionally, restore configuration from a previous back-up - this will save you a lot of work!
- If the 'Full System Backup' is on an external drive, select it and restore
- If the 'Full System Backup' is on a networked PC, map the drive first
9 Next, open the CallPilot Manager and run the Configuration Wizard...
Within the Configuration Wizard you can:
- Verify the Dongle ID (serial number) and keycode (if restored)
- Enter (or verify, if restored from a backup) the M1 PBX configuration
- Install languages (from CD or USB drive). This will also flash the DSP's.
- Manually enter the keycode, PBX and IP address configuration (if no backup is available)
Restoring CallPilot from a backup (in the Setup Wizard) also restores the languages, so a Language CD is not required in this case.
You must however still run though the Configuration Wizard steps, but click: "Skip Language installation" and "Next" at that screen.
When CallPilot is fully configured/restored/functional/in-service, don't forget to define a new backup device, set a backup schedule, and create a new 'Full System Backup' (Run Now).
- You can re-image the CP as many times as you want, because it's so much fun!
- A replacement HD must be minimum 73GB. Format SCSI drives using the built-in SCSI BIOS utility.
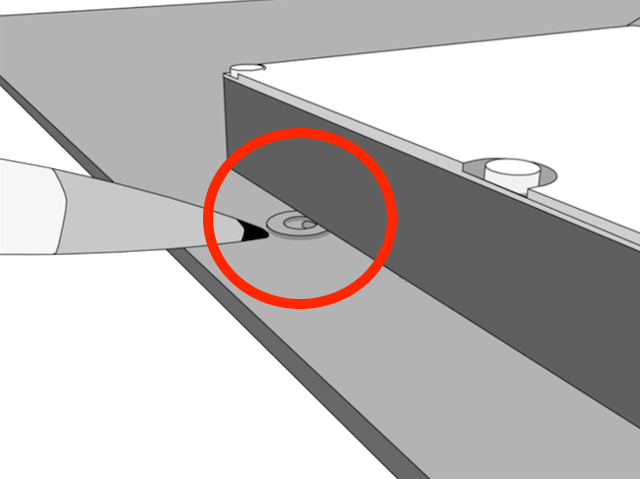
- When replacing the hard drive (201i/202i), locate and re-use the four fiber washers - see picture →
- The 202i has a SATA interface, replace a failed drive with an SSD (min. 250Gb) for a huge performance boost.
