CS1000E Rls. 7.5 Installation
12. Backups
 DO NOT underestimate the importance of back-ups!
Frequent back-ups can be made during the installation.
CPDC Backup to USB device:
With a USB storage device plugged into the CPDC card faceplate, access the CPDC command shell (CLI) either by SSH, or serial.
- Login with the admin password.
- Issue the command:
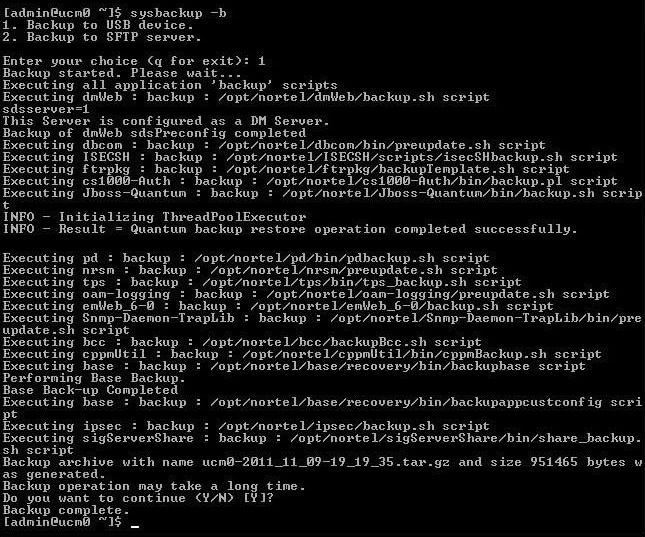
sysbackup -bThe following is returned:
1. Backup to USB device.
2. Backup to SFTP server.

Enter your choice (q for exit):
- Respond with 1 to Backup to USB device.
After about a minute, the screen will output the following:
Backup archive with name host-date-time.tar.gz and size xxxxxx bytes was generated.
Backup operation may take a long time.
Do you want to continue (Y/N) [Y]?
Press <enter> (to accept the default Y), and the generated tarball will be copied to the USB drive.
Execute a sysbackup on both UCM0 and UCM1. See Backup the Linux Base for further details.
 This process can be scheduled on each Linux Base card (+MAS).
Use:
sysbackup -c to set a schedule, sysbackup -s to review.
NOTE: sysbackup will backup the Linux base, IP settings, and passwords only. It is not a complete backup solution.
Example TTY output:

NRS Backup:
Navigate to Tools ➤ Backup.
At the Select backup action dropdown box, choose Manual backup and click Submit.
A backup is completed with the file left on the system.
To download the backup file to the local PC, click Download the latest backup file.
A popup box will ask if you want to save the file. Click Save.
When the Save As box opens, navigate to the location you want to save the file and click Save.
Perform data dump:
From within EM, navigate to Tools ➤ Backup & Restore ➤ Call Server. Click Backup.
With Action showing Backup, click Submit.
Or, from the Call Server, do the familiar LD 43, EDD
What now?
- 2616 sets with old firmware may have display issues, check, and swap them out if affected. I don't know of another fix for this.
- 390X sets will need a firmware update to fix the call-transfer softkey, do this in LD 32, FDLU l s c u. If a lot of sets are affected, build a schedule (in LD 97) to do this out of office hours. Refer to 39xx Flash Download for further details.
- Analog sets may have DTMF issues. Goto LD 97, and PRT DTR. If the minimum accept level (MINL) is at -3, CHG it to -42.
Note, if you change MINL, you must delete and rebuild all the DTR's (LD 13) for the new value to take effect. - Relaxen und watchen das blinkenlichten, before leaving for a well deserved cold one (or two).
- And remember: if it ain't blinkin', it ain't thinkin'!