CS1000E Rls. 7.5 Installation
6. Preconfigure and predeploy network elements
We added the CS1000 to the secure domain, doing this before deployment will preload some of the CS1000 deployment options...
Access Deployment Manager:
From the main UCM screen navigate to Network/Software Deployment. The first time visiting this screen you'll be prompted to enter the admin username and password.

Upload the .nai files:
Before pre-deploying applications, the NAI file(s) containing the software must be loaded. Copy the .nai file(s) to the installation USB memory stick, and plug the stick into a Deployment Server card USB port.
On the left click Software Loads. Choose Deployment Server for the software location. This will produce another dropdown box with USB Device pre-selected. Click Browse. All available .nai files will be offered as options to upload. Select the .nai file to upload and click Add Load. An upload from the USB drive may take about a few minutes. Do not leave this page until the upload is complete.
BEWARE: It's not unusual for uploads to fail. If the upload does fail, try it again!

Once the upload is successful, click Deployment View on the left.
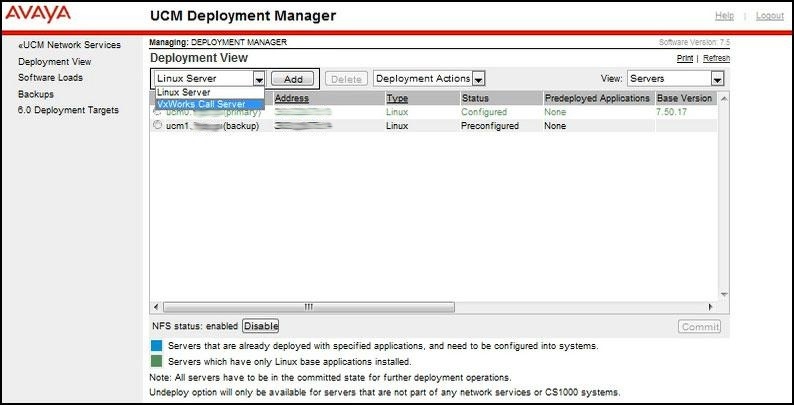
The Deployment View main screen is made up of three drop down boxes on the top and a field of information below. The third drop down box, View, determines what is shown in the field below. In Servers view, you can see what Linux Servers and VxWorks Servers are configured. Before any assignments can be made under any other view, you must have the servers defined.

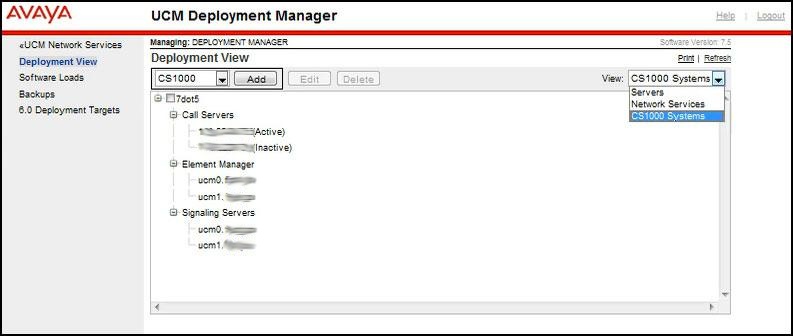
The next view option is the Network Services view. Here you can add IM Presence, MAS, NRS, SIP Trunk Bridge, and Subscriber Manager. The next view option is the CS1000 Systems view, sample image below, where the CS1000 system is added. In order to have applications associated with a CS1000, such as signaling server and Element Manager, there must be a CS1000 system.

The first drop down box along with one to three buttons to the right - depending on the view, provides options to add, edit, or delete components. The middle drop down box is only present in Servers view.

Proceed, to pre-deploy and pre-configure the backup security server, the CS1K, and all applications. With 3 CPDC cards, applications maybe defined as follows:
UCM0 - Element Manager Leader, NRS Primary, Subscriber Manager
UCM1 - Element Manager Follower, NRS Alternate
The Media Application Server (MAS) is a standalone unit, no other applications can be added to it.
Add the backup security server:
- With Linux Server selected, click Add.
- Configure the IP address, host and domain name information and click Next.
- Skip the DNS server screen by clicking Next.
- Use the drop down box to select your Time Zone.
- In the Network Time Protocol box set the Clock Source to an NTP server type of Not a clock server, and enter the IP address of the Call-Server. Click Next. (Yes, I know this is incorrect! Refer to Set the Time with NTP for the correct settings).
- Set the Hardware type: to CPDC, then set the admin2 and root passwords the same as the first card. Click Next.
- Set the Server Type: to Backup security server and click Next.
- Review the information and click Next.
- On the Certificate information screen, make sure the Bit length: is the same as was set on the primary security server - in this case 512.
- Accept the default for all other entries and click Finish.
Note: If you had already joined the backup security server (UCM1) to the Secure Domain, it will already exist.
Add a VxWorks Call Server:
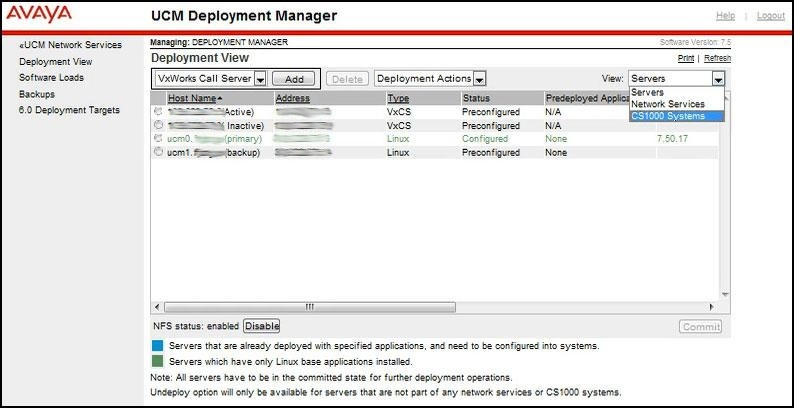
- With VxWorks Call Server selected, click Add.
- Select High Availability System if installing two cores.
- Enter the active and inactive call server IP addresses and click Finish.
Note: If you had already joined the Call Server to the Secure Domain, it will already exist and just need configuring...
Add the NRS:
- From the Network Services view select NRS and click Add.
- Provide a Name and Description then click Next.
- Use the drop down box to choose which Linux server to install the Primary NRS Server (UCM0).
- A second drop down box will appear to select the Secondary NRS Server (UCM1).
- Click Finish.
Add the signaling servers and Element Manager:
- From the CS1000 Systems view select CS1000 and click Add.
- Enter a CS1000 Name, Description, and the Call server tape ID then click Next.
- Using the drop down boxes assign Element Manager to two Linux servers (UCM0 / UCM1).
- On the bottom half of the screen choose Linux servers for the two signaling servers. Leader and follower SS assignments are made while building the node.
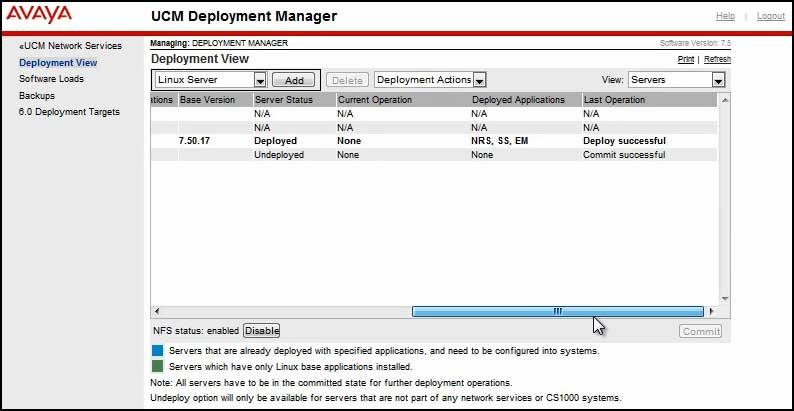
Back on the Deployment Server main screen in Servers view, the field on the lower part of the screen should show CPDC cards and CS1000 core(s). In the Status column the VxWorks Communications Servers (VxCS) remain preconfigured until registered, when they change to configured. The Linux servers stay predeployed until they are committed and deployed. The Predeployed Applications column displays the applications assigned to each Linux server. There are several columns to the right with useful information intuitively easy to understand.

Commit configuration then deploy applications on the primary security server:
- On the lower right of the Deployment View, click Commit. The Status of all Linux servers should show Committed.
- Click the radial button next to the primary security server. In the Deployment Actions drop down box, select Deploy.
- A popup box will ask to confirm the operation. Click OK.
- Once complete the Server status should show Deployed. Just below that the version and services are displayed.
- Click Return to go back to the Deployment View screen.
The primary security server's status column will now show Deployed. The Deployed Applications column shows what applications, or services, reside on that server.

Apply the Service-pack:
Having deployed our applications, we can now load the Service-pack. The Service pack applies additional patches depending on the deployed applications, and so should always be run AFTER deployment.
Having previously uploaded the Service Pack (via SFTP) to /var/opt/nortel/patch/sp, we can now load and install it!
Login locally to each CPDC card, with admin2, and use the commands: spload <filename.zip>, followed by spins to install. The command spstat will display the Service pack status.
Always patch the PRIMARY UCM0 first, then the backup UCM1, followed by any Member servers.