CS1000E Rls. 7.5 Installation
4. Install CS1000E & join it to the security domain
The steps involved:
- Install Software & CP-BOOTROM on Core-0,
- Load/import the customer database
- Configure the Call server time and IP addresses
- Backup the new customer database
- If Dual-Core (High Availability):
- Install Software, Database, CP-BOOTROM on Core-1, importing the new core-0 database
- Join the Cores to make system redundant
- Register the Call server with the secure domain.
Steps in more detail:
Equip the CPPM card(s) with ELAN and HSP (if dual-core) network connections, and connect with a serial TTY (9600/8N1).
With the Avaya CS1K 7.5 Install RMD in the Core-0 faceplate slot, hit RESET. Press F when prompted to force boot from the faceplate drive. After successfully booting from the Install RMD, and entering yes a few times, the INSTALL MENU appears:
        Communication Server 1000 Software/Database/BOOTROM RMD Install Tool
        ====================================================================

                         I N S T A L L    M E N U

        The Software Installation Tool will install or upgrade
        Communication Server 1000 Software, Database and the CP-BOOTROM.

        You will be prompted throughout the installation and given the
        opportunity to quit at any time.

        Please enter:
<CR> -> <a> - To install Software, CP-BOOTROM.
        <b> - To install Software, Database, CP-BOOTROM.
        <c> - To install Database only.
        <d> - To install CP-BOOTROM only.
        <t> - To go to the Tools Menu.
        <k> - To install Keycode only.
               For Feature Expansion, use OVL143.
        <p> - To install 3900 Set Languages.
        <q> - Quit.

        Enter choice> a
Follow the on-screen instructions to install the software, and a (converted if upgrading) customer database.
- Large System Upgrade: Follow the prompts to install the software and database (OPTION B)
- Small System Upgrade: First install the software (OPTION A), then convert your database (OPTION C)
IMPORTANT! The customer database must be *without* any Meridian Mail. Remove all traces of Meridian Mail from the previous system database, and EDD it, before installing it on the new system. The ENET card configuration cannot be removed later.
CS configuration:
Login with admin2/0000 (or previous account if a converted DB), set the correct time, edit the active hosts table (requires a re-boot, but EDD it first!), and create three pseudo TTY's. Finally, goto LD 43, and EDD all your hard work.
- Set the correct time in LD 2
- OUT any ADAN TTY's of card type QSDI, and build three NEW as card type PTY - with USER SCH and MTC.
- In LD 117 add host entries for the active and inactive cores.
new host primary xxx.xxx.xxx.XX
new host backup xxx.xxx.xxx.YYAssociate those hosts with the relevant ELNK:
chg elnk active primary
chg elnk inactive backup - Don't forget LD 43, EDD - to save your configuration changes.
Database installation:
Selecting OPTION C from the main INSTALL MENU will display the following:
       Communication Server 1000 Software/Database/BOOTROM RMD Install Tool
        ====================================================================

        You will now perform the database installation.


        Please enter:
<CR> -> <a> - Install CUSTOMER database.
                The Removable Media Device containing the customer database
                must be in the drive.
        <b> - Install DEFAULT database and DEFAULT accounts.
                The System S/W media must be in drive.)
        <d> - Transfer Small System database.
               The RMD containing the database must be in the drive
        <e> - Check the database that exists on the Fixed Media Device.
        <q> - Quit.

        Enter choice> d
- Large System Upgrade, or installing a previously saved 7.5 database, choose OPTION A: Install CUSTOMER database.
- Small System Upgrade: choose OPTION D: Transfer Small System database.
The small system database will be automagically converted to a large system format. - New installation: choose OPTION B: Install DEFAULT database and DEFAULT accounts.
For a dual core (HA) installation, repeat the procedure for Core-1, but now install your freshly saved database (from above).
After re-booting, the cores should perform a disk sync and join. If not join cores in LD 135. Perform an scpu, or two, and make sure the cores switch smoothly. High Availability (HA) Call Servers must be redundant before registering.
When your system is stable (and redundant if HA), goto LD 117 and request to join the secure domain: reg u s.
Once registered, the secure username/password account will apply.
Join the CS to the security domain:
- Make sure you can ping the cores (ELAN) from another device. This might require a re-boot of the call server(s).
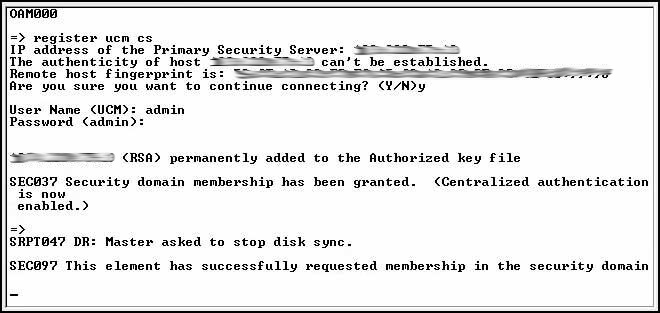
- In LD 117, join the CS into the security domain with the following command:
- => register ucm system (can be abbreviated to
reg u s)Note:
reg u csregisters the CS,reg u sregisters the CS and all its components (including MGC's etc). - => register ucm system (can be abbreviated to
- The system asks for: IP address of the Primary Security Server: It then provides the fingerprint that was provided when the primary security server was configured. If the fingerprint is different, there is a problem. The system asks if you want to continue. Respond with Y, upper or lower case.

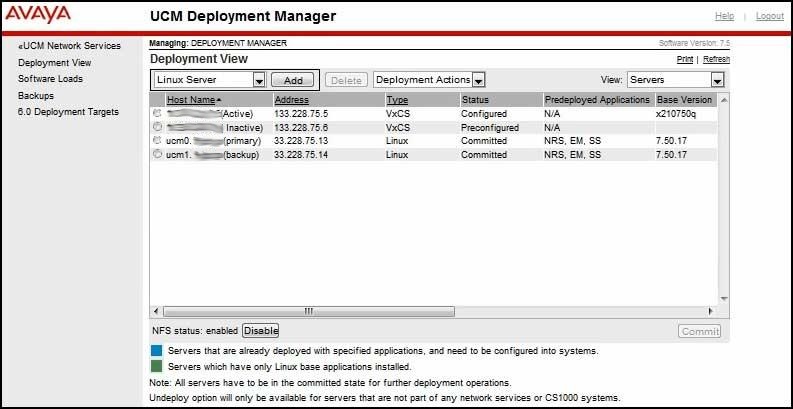
An SEC097 message is output stating Security domain membership has been granted. Check Deployment Manager to see if the core or system's status has changed to Configured.

Continue with patching your system...