Small Community Network
IP Office systems linked by IP trunks can enable voice networking to form a Small Community Network (SCN). Within an SCN the separate IP Office systems 'learn' each other's extension numbers and user names. This allows extension calls between systems and support for a range of internal call features. Note that short codes still need to be built on each system for trunk calls (eg, dial-9).
- Maximum Number of Systems: 32
- Maximum Number of Users: 1000
- Maximum H.323 Line Hops Between Systems: 5
- A star, serial or mesh data network between sites
- IP500 Voice Networking licenses on all systems
- Appropriate VCM channels in all systems
SCN is supported between IP Office systems with the same major software level, or one level of difference in major software level.
Within a SCN using differing levels of software, network features will be based on the lowest level of software within the network.
It is recommended that all systems within a Small Community Network are upgraded to the same level where possible.

Use WAN/LAN2 for IP phones and the SCN; LAN/LAN1 is for local maintenance.
Note, all IP Office's and SCN trunks should be on the same (LAN2) interface.
Setup a VoIP Line from System A to System B
1Make sure all names and extension numbers are unique within the multi-site network.
- For users and extensions this can be done with Extension Renumber.
- For hunt groups, each hunt group must be changed individually.
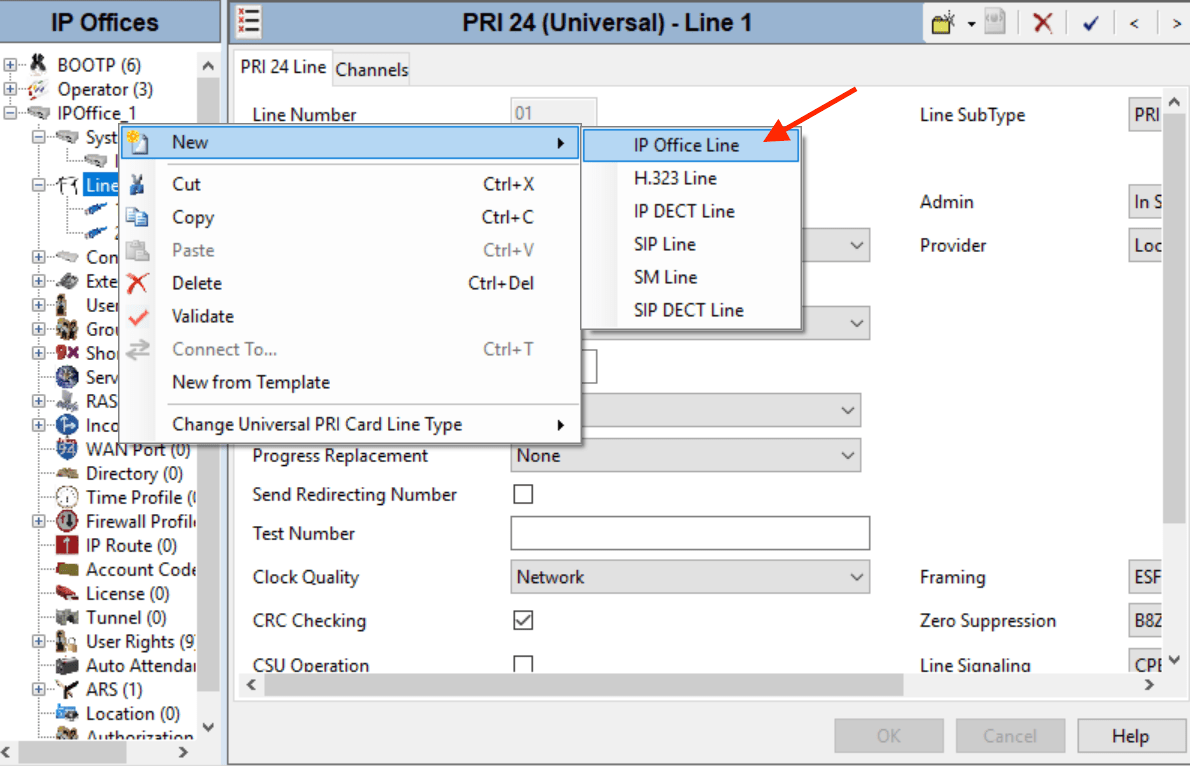
2Right-click Line, and select New ➤ IP Office Line.

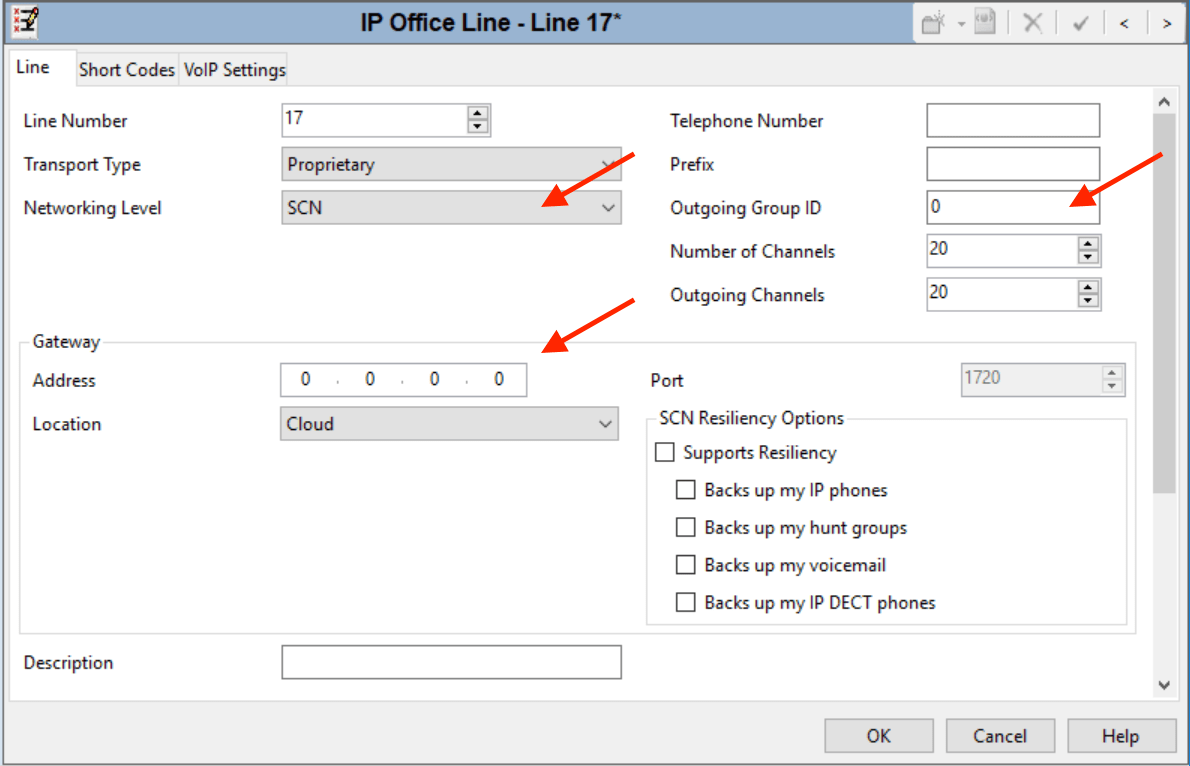
3Select the Line tab and set the following:
- For Transport Type, select Proprietary.
- For Networking Level, select SCN.
- For Description, enter a link description, eg. System B SCN.
- Set the Outgoing Group ID to a unique value, eg. match the Line Number value.
- Under Gateway, enter the System B ip address at Gateway IP Address.

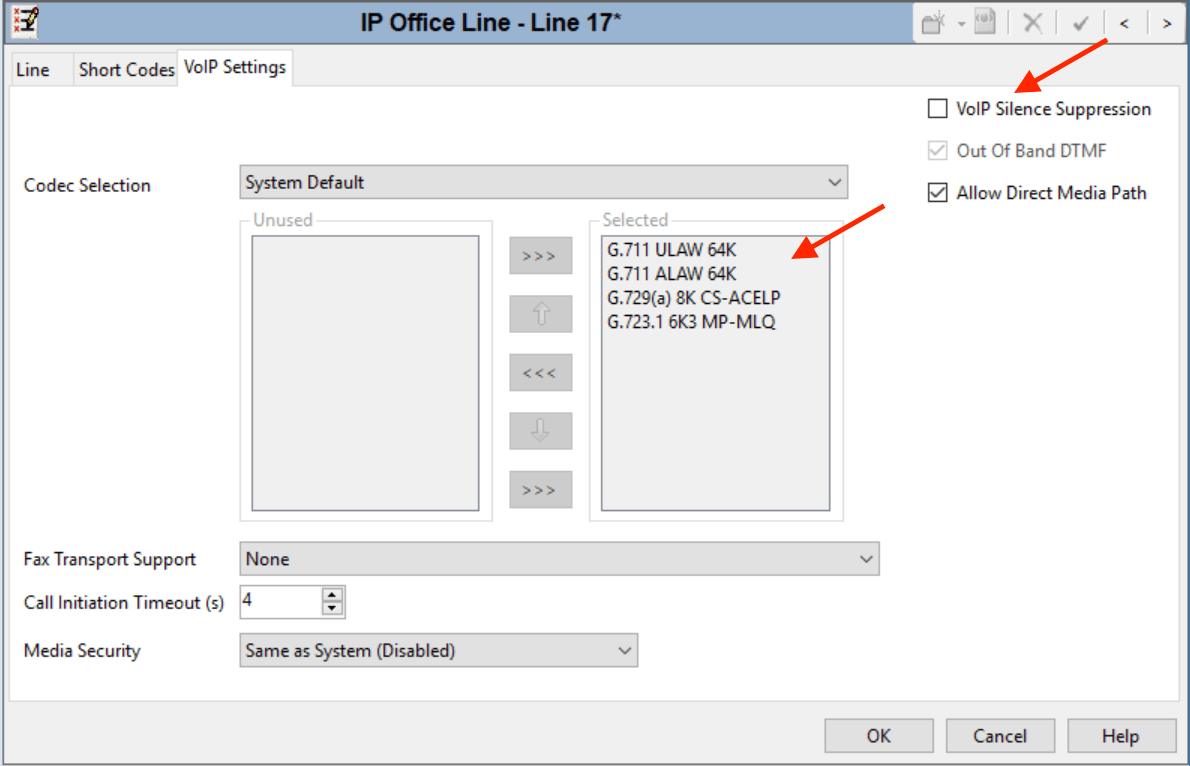
4Click the VoIP Settings tab.
- Select the preferred Codec Selection (must match on all Systems).
- Silence Suppression settings on all the network trunks must match.

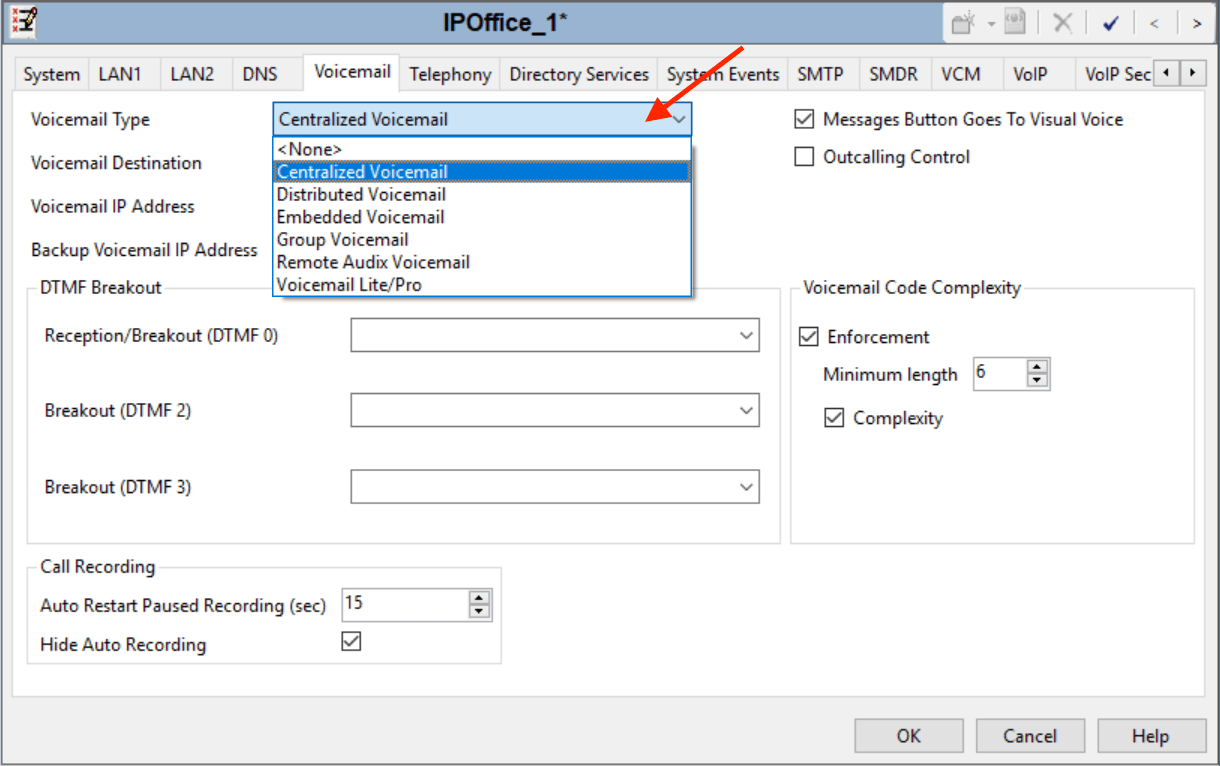
5Select System ➤ Voicemail.
- Only one system should have its Voicemail Type set to Voicemail Pro/Lite.
The Voicemail IP Address will be the IP address of the central voicemail server. - Any other system with its own Voicemail Pro server should have its Voicemail Type set to Distributed Voicemail.
The Voicemail IP Address will be the IP address of the distributed voicemail server.
The Voicemail Destination is set to the Outgoing Group ID used for the SCN line to the system set as Voicemail Pro/Lite. - All other systems should have their Voicemail Type set to Centralized Voicemail.
The Voicemail Destination is set to the Outgoing Group ID used for the SCN line to the system set as Voicemail Pro/Lite.

6Save the configuration and reboot System A.
Setup the VoIP Line from System B to System A
1Repeat the steps to create an IP Office Line to System A.
- The line settings, especially the VoIP settings, must match those used for the other IP Office Lines in the network.
2Save the configuration and reboot System B.
3Make test calls between extensions on the different systems.
Manager
SCN discovery must be enabled in the Manager in order to find and load each SCN member configuration.
- Goto File ➤ Preferences
- Select the Discovery tab
- Check SCN Discovery
- Click OK
Call Routing
SCN automagically takes care of routing only extensions. Short codes are still required to send other call types (eg, trunk) to another system.
The short code Line Group ID will be the Outgoing Group ID assigned to the IP Office Line connected to the tandem system.
Note that a local extension number will override a conflicting short code, though ideally any dialing conflicts should be resolved.
Ensure that Line ➤ "Allow direct media path" is unchecked if the network topology doesn't support it, eg, with multiple sites.
Source: Avaya documentation