Option 11 & Meridian Mail
Note: PBX ACD's, DN's and AML should be programmed before following this procedure.
In this document, MM refers to Meridian Mail.
Hardware:
The internal HD is set to SCSI ID0, which means no ID jumpers are required.
Mount the HD onto the MM card, using the washers and spacers (important!) provided. Attach the LED cable. Mount the voice daughter board(s). We usually use 12 port systems, which means two daughter boards need to be added (four ports each, plus four on the main PCB). Insert MM into the main cabinet, slot 10, but DO NOT push the card home at this stage.
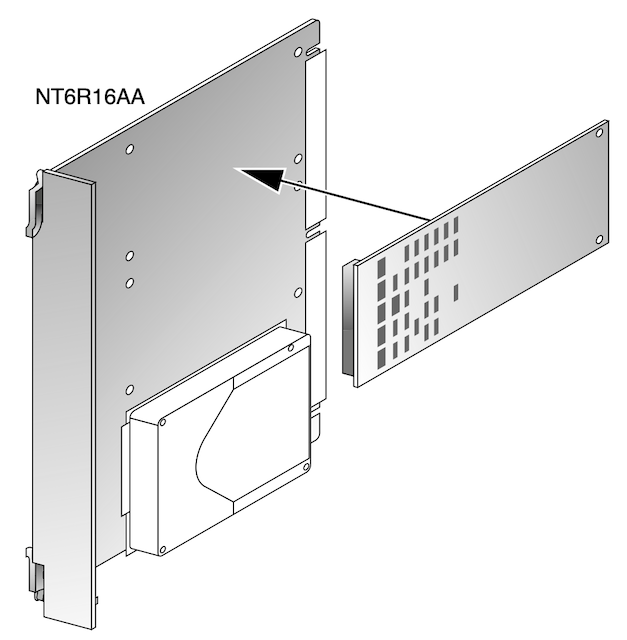
Attach the DSP daughterboard(s)
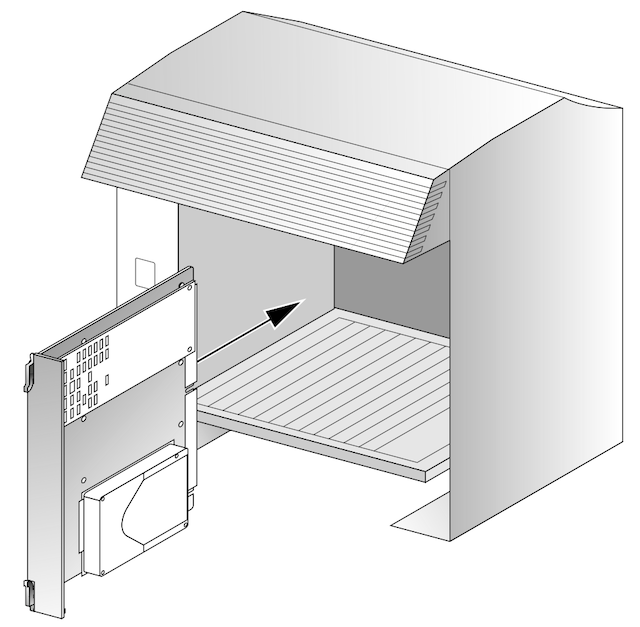
Install the Meridian Mail card
The following hard drives are supported:
- Seagate ST31230N (1.2 and 2.0GB),
- Seagate ST51080N (1.0 GB), and
- Seagate ST32151N (2GB)
Additional hard drive info is available here.
Meridian Mail software is NOT pre-loaded, and must be installed from the tape.
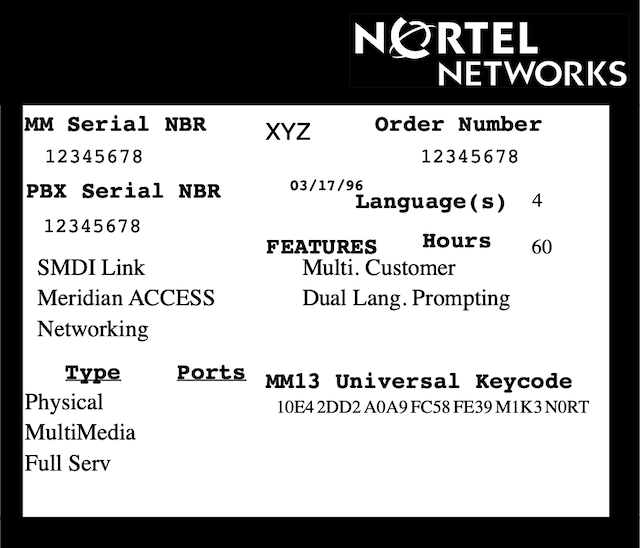
Find your meridian mail keycode, installation tape, tape drive, and right-angle SCSI
cable.
A Typical Keycode:
Software:
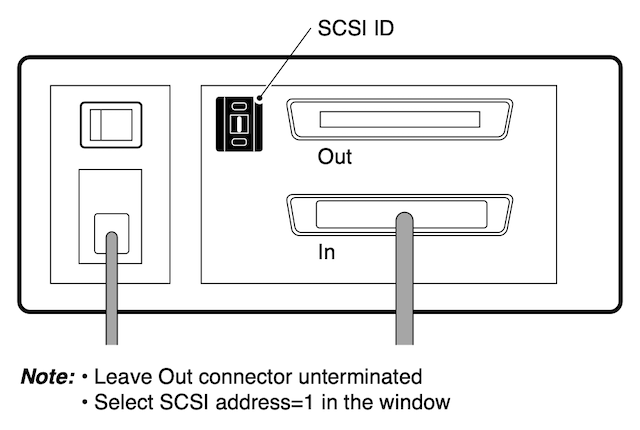
Set the Tandberg tape drive to SCSI ID 1, use the bottom SCSI connector - marked IN. The Tandburg drive has internal terminating resistors, so the other connector must be left open. Carefuly connect the other end of the cable to the MM card (front middle, behind the face plate).
Tandburg Tape Drive:
Log into the PBX, type AX at the > prompt, so you can watch the boot up progress, and access the MM menus. Ctrl-R redraws the display.
Note: MM requires Application Keypad mode, and older Hyperterminal versions do not support this! To use Hyperterminal, download and install Hyperterminal 6.3 and set it for VT220 emulation. The terminal emulation module in MAT or OTM is also compatible. PuTTY can be configured for MerMail, and is a good alternative! Exit MM with Ctrl-] (control close left bracket).
Boot (startup) the Meridian Mail system from the install tape, and install the software onto the hard drive:
- Turn on the tape drive, and insert the install tape. It will tension.
- When the tape rests, push Meridian Mail card firmly home (into slot 10).
- The "power on self tests" take about 4 mins, after which the tape should run.
- After another 5 or so mins, a 3 option menu will appear. Watch for TTY output.
If the tape doesn't start to run after about 5 mins, pull MM card, and check the SCSI connections. The SCSI connectors must be firmly seated. Be patient! It takes a long time to boot from tape!
Installation Menu
After a successful boot from the installation tape, the installation menu will appear:
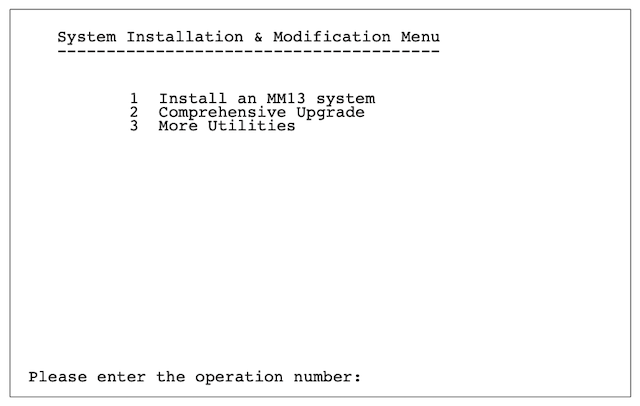
From the menu, select 1 to install MM software.
Follow the menu's: Enter keycodes, add a language, check detected hardware is OK, etc.
In 'detected hardware', a display of hardware similar to the one below will be shown:
| card-1 | card-2 | card-3 | card-4 | card-5 |
| mmp40 | rsm | nvp32 |
Cards 1-3 are all on the main MM PCB. If you've added voice daughter boards, card 4 and card 5 will also show nvp32. If the installed daughter boards do not appear on the hardware list, power off MM, reseat the daughter cards - and start the procedure all over again! The auto detected hardware must match your configuration.
Note: you will have a mixture of basic and full ports, your keycode defines this. Set the 'Voice Hardware Location' to a mixture of Vb and Vf as required. Basic ports are for auto-attendant, full ports are for voice mail. Change the ACD DN to match the PBX settings.
When the options are complete, the tape will run, and the software is installed onto
the hard drive. This process takes 45mins or so.
Install Complete:
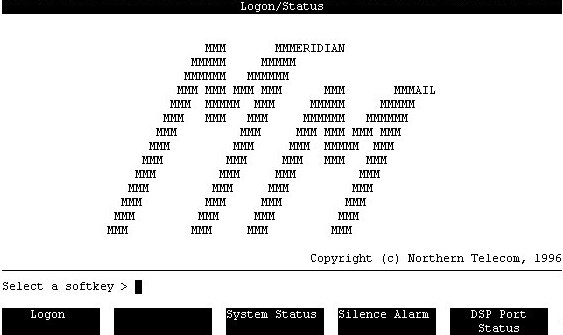
When it has finished installing the software, tape activity will stop, the tape LED will go off, and a TAPE message will be displayed on the screen. Carefully remove the SCSI cable and press the front panel reset to boot MM from the internal hard drive.
After about 5 mins, the MM logon screen should appear. System Status should show "In Service". Dialing an ACDN (5555 or 5100) should result in a greeting. It works! Now create mailbox's etc.
NOTE: It may be necessary to INI the PBX so MM can check the TID (Tape ID). This is tied to the keycode, and must match.
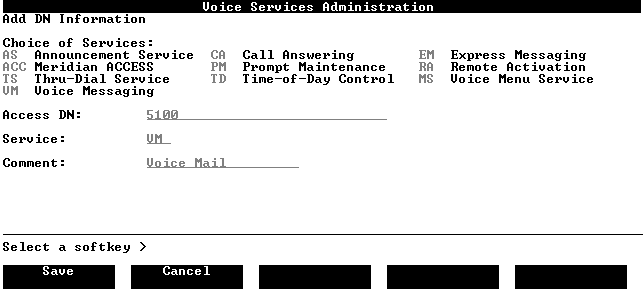
Dial the Voice Messaging Access DN (see ACD Programming), and a voice should answer!
If the greeting says "cannot connect at this time", you have forgotten the VSDN entry.
Create an entry for the Mail DN (eg, 5100), service VM.
If the greeting says "user does not subscribe to this service", the VSDN is OK, but the user mailbox does not exist.
If status shows "loading", the PBX programming is suspect - the AML link is probably down. STATing the ACD agents in LD 32 should show them all "logged-in".
Checking the AML:
Check the AML in LD 17, and change enabled to yes.
ADAN: CHG AML 9
ENL: YES
Also, enable it in LD 48:
.enl aml 9 acms
.stat aml 9 should return LYR2: CONNECTED LYR7: ACTIVE.
Push the reset button on MM's front panel to restart with the AML now up.