Using PuTTY for Serial
PuTTY can replace HyperTerminal for serial communications. It provides logging, a large scroll back buffer, and many other features. You are probably already using PuTTY for SSH and Telnet, but you can also use it for Serial TTY console connections.
If you use an Apple Mac computer, refer to: Mac's and serial TTY's.
Setup
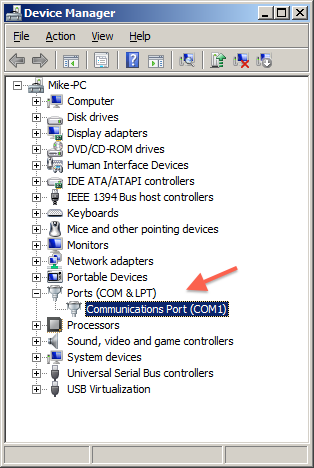
1Plug in your USB to Serial adapter, and determine its COM port number by opening the Windows Device Manger (a driver must have previously been installed for the adapter).
- Start ➤ Control Panel ➤ Device Manager
- OR -
Right-Click My Computer, and select: Properties ➤ Device Manager - Expand: Ports (COM & LPT)
The serial adapter should be listed:
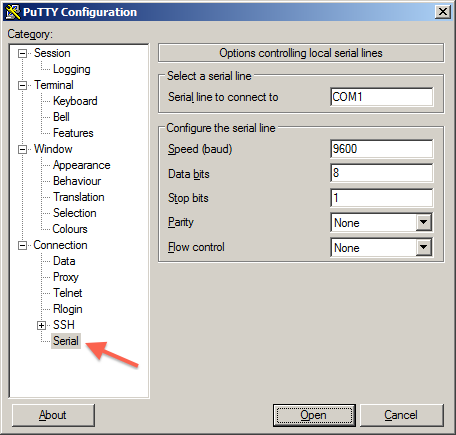
2Open PuTTY, and click Serial from the Category: Connection.
Edit the settings, eg: COM1, 9600, 8, 1, None. Flow control: None.
3Select Category: Session, click the Serial radio button,
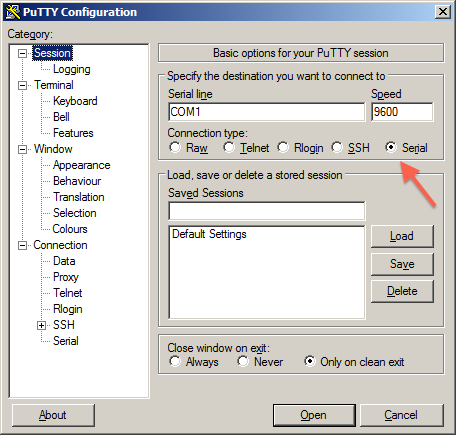
4If you want to save this session, enter a name in Saved Sessions and click Save.
This will ensure that you have quick access to your commonly used sessions. Settings are saved within PuTTY, so copying the application to a different machine will also copy your saved sessions.
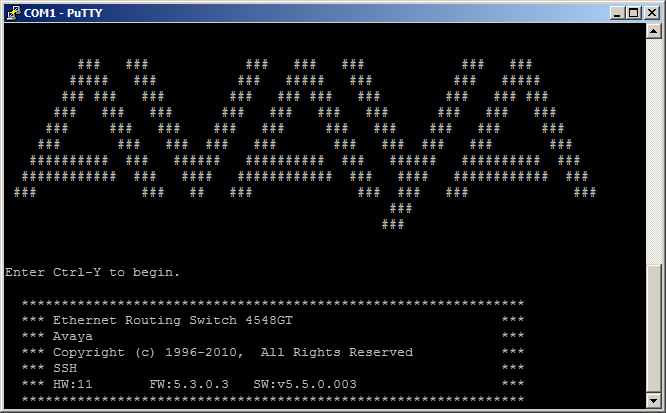
5Click Open and a serial session will start.
Session logging
To create a text log file, right click on the PuTTY menu bar, and select Change Settings.
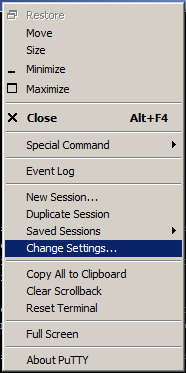

- Click Logging from the Category: Session
- Click the Log All Session Output radio button.
- Click Browse and select a folder and filename for your log file, eg: C:\Users\Mike\Desktop\putty.log
- Click Apply, and the log file should appear in your chosen location.
Scroll-back Buffer
To lengthen the scroll-back buffer size, right click on the PuTTY menu bar, and select Change Settings.

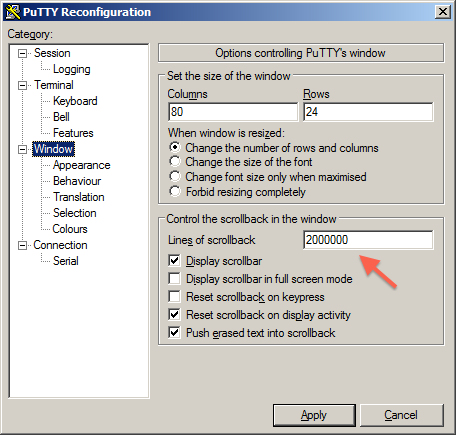
- Click the Category: Window
- Enter a large number at Lines of Scrollback
- Click Apply.
Or, download an ISO image of the Procomm Plus 32 installer CD, but you're going to need an old XP PC to run it.