Node Configuration
IP Telephony Node setup from Element Manager
Required:


- Call Server: ELAN address
- SS0/SS1: ELAN+TLAN addresses
- ELAN Gateway address
- Node ID: unique on network
- Node IP IPv4 address (TLAN)
- H.323 ID: name (string)
- SIP Domain: FQDN
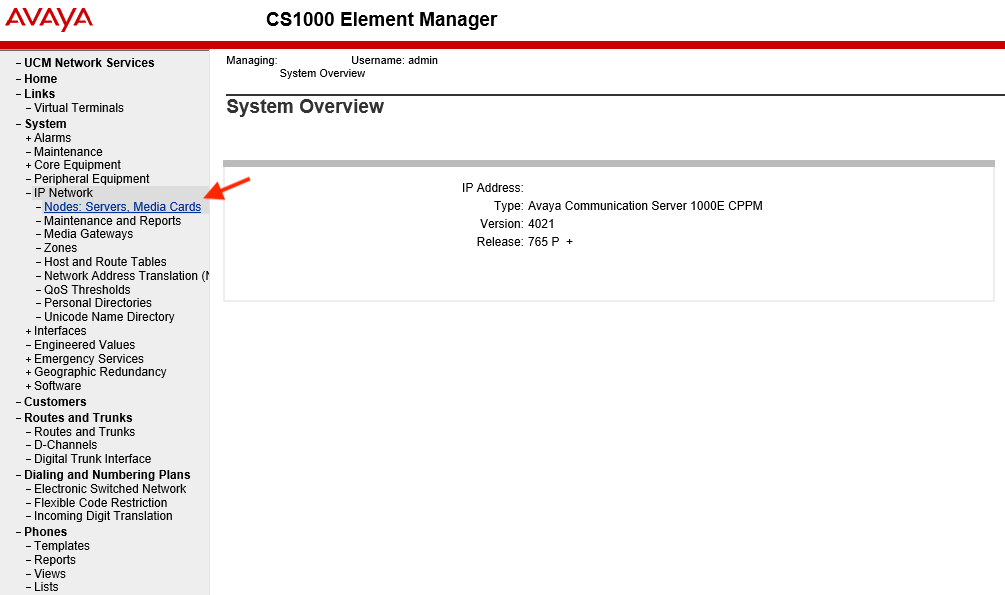
Open Element Manager
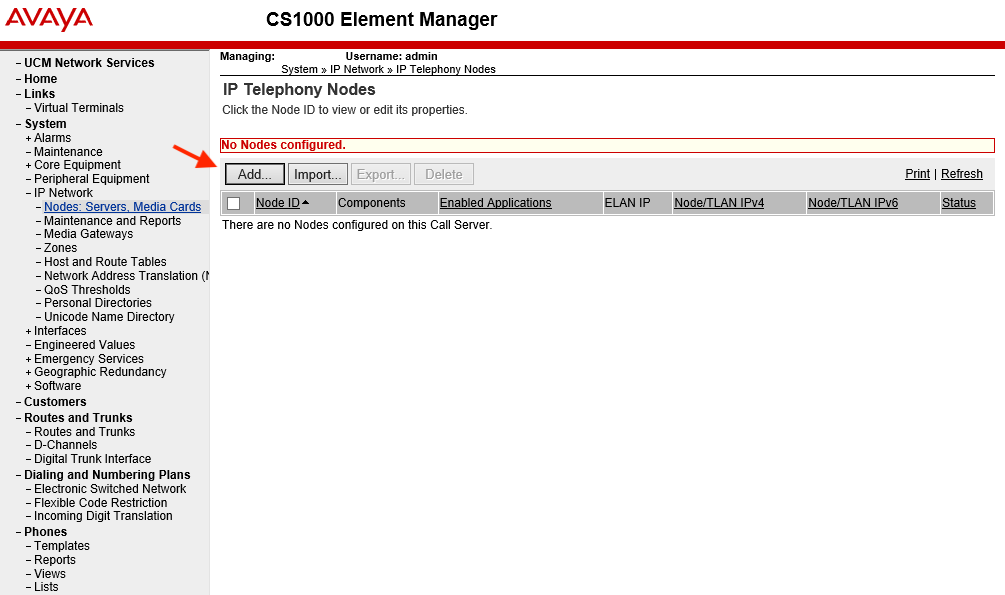
IP Network > Nodes: Servers, Media Cards
Click ADD
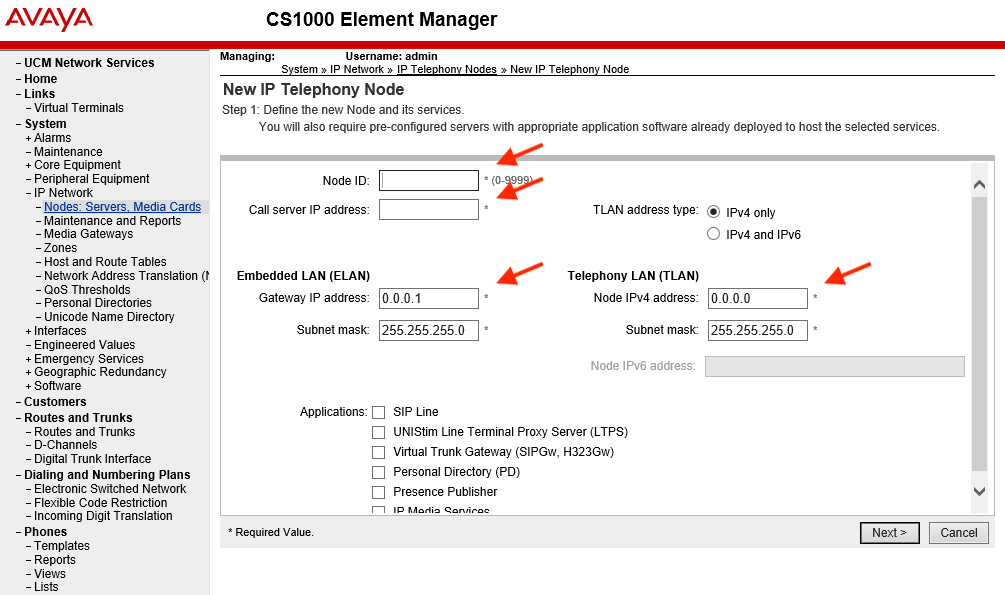
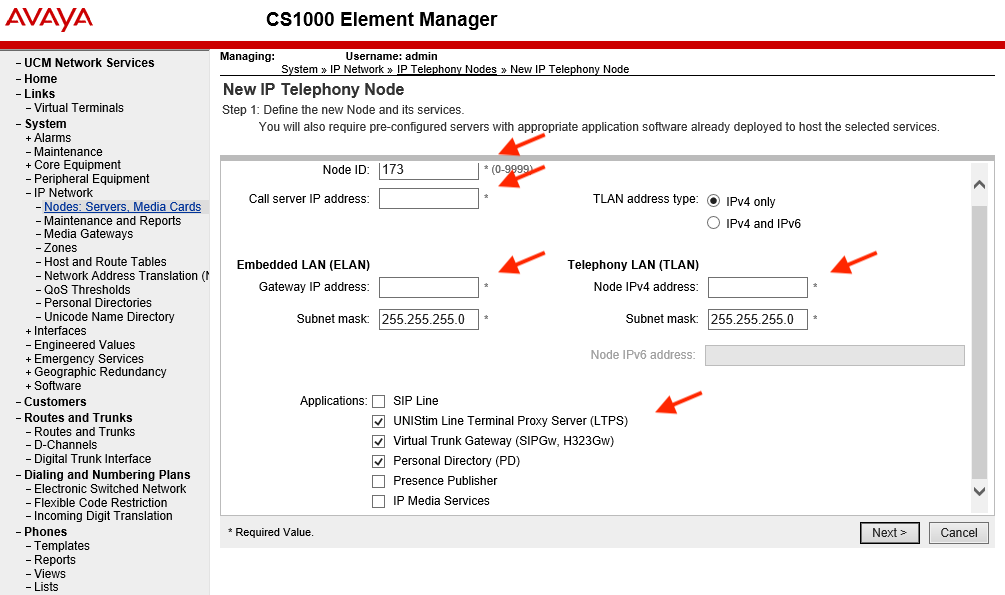
Enter: Node ID (must be unique in network), ELAN Gateway IP, Node IP (a unique TLAN address)
Check: UNIStim Line Terminal Proxy Server, Virtual Trunk Gateway, Personal Directory
Click NEXT
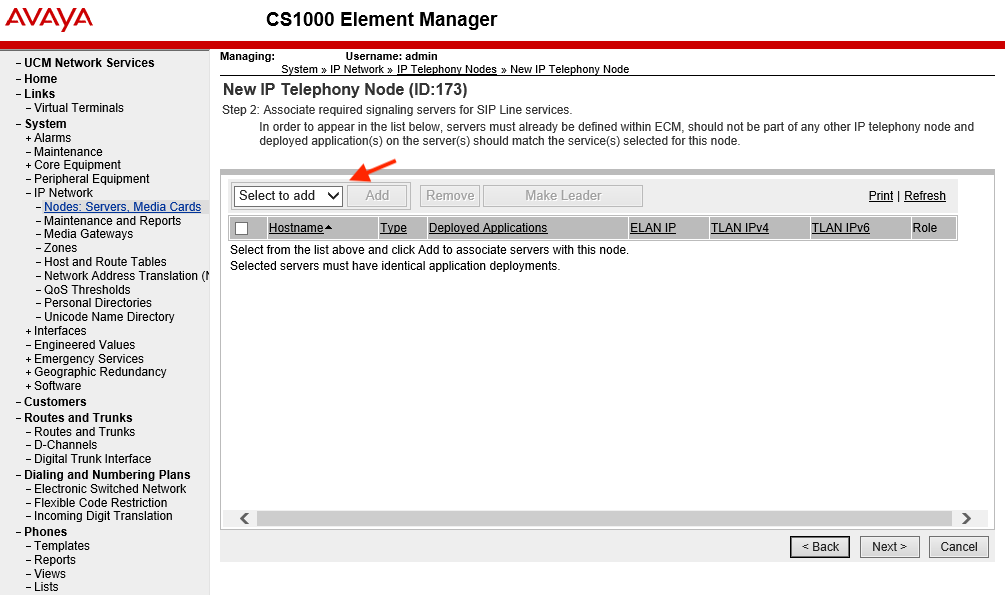
Add SS0 and SS1 servers from the drop down
Check SS0 and make it the Leader...
Click NEXT
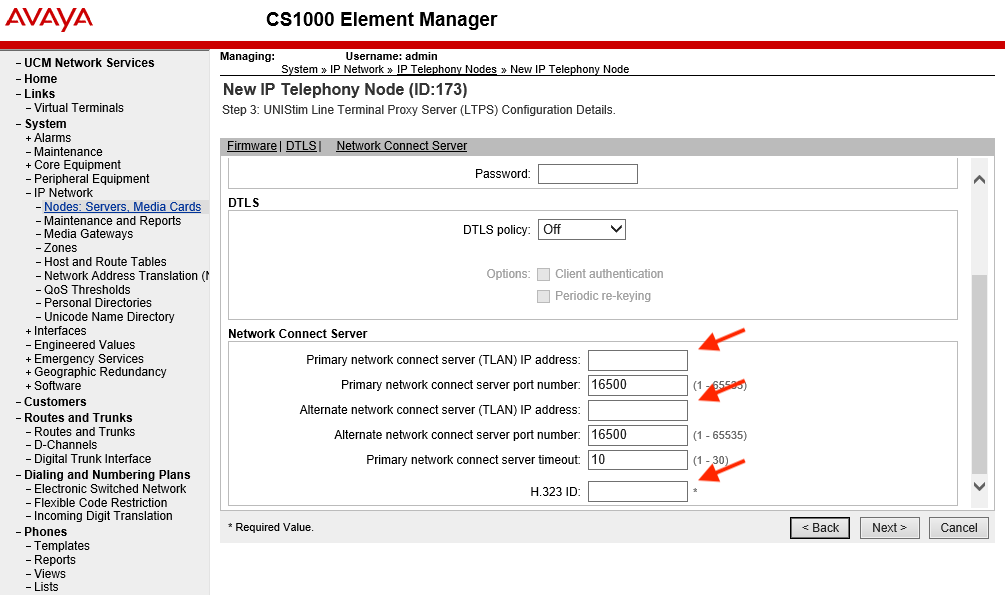
Scroll down to the 'Network Connect Server' section...
In the 'Network Connect Server' section: enter Primary and Alternate connect server IPs (SS0 and SS1 TLAN), and H323 ID (string)
Click NEXT
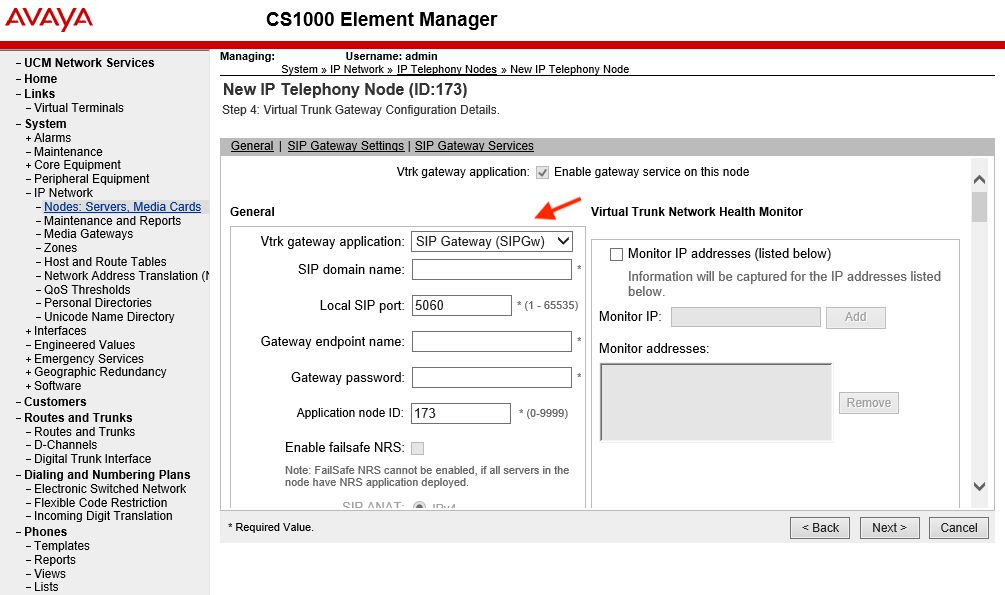
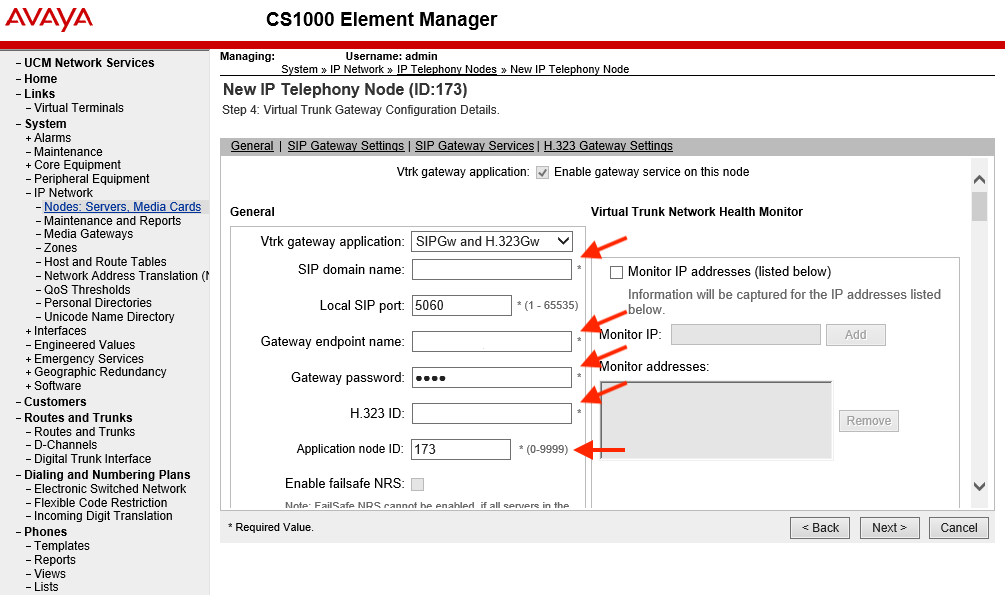
Vtrk gateway application: select 'SIPGW and H.323GW' from drop down
General section, enter 'SIP Domain name', and 'Gateway endpoint name' (the H323 ID), enter a password, eg: 0000
Don't hit NEXT, scroll down for more...
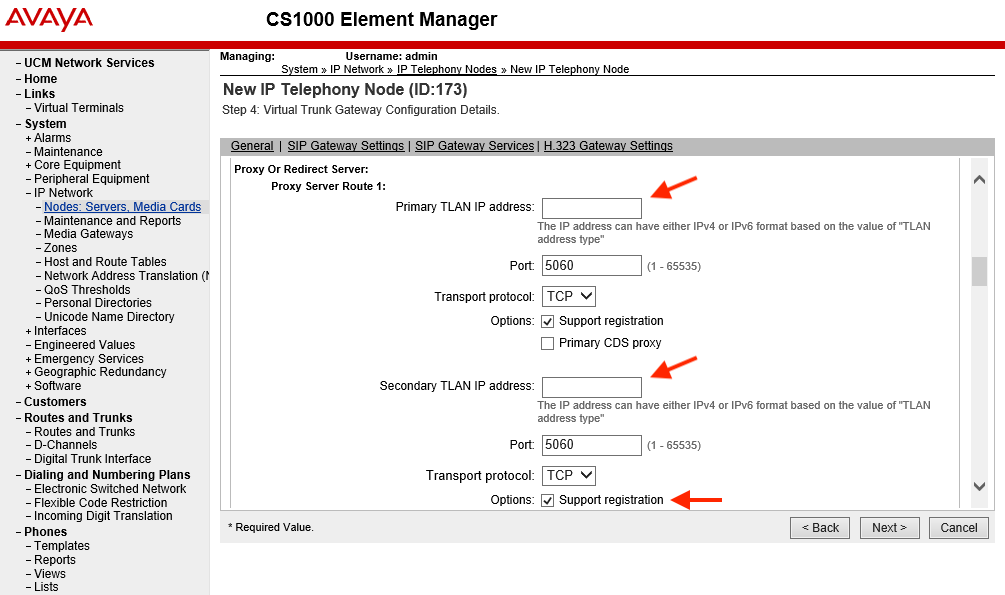
Scroll down to SIP Gateway Settings section > Proxy Or Redirect Server Route 1
Enter Primary and Secondary TLAN addresses (SS0 & SS1), check Support Registration at Options
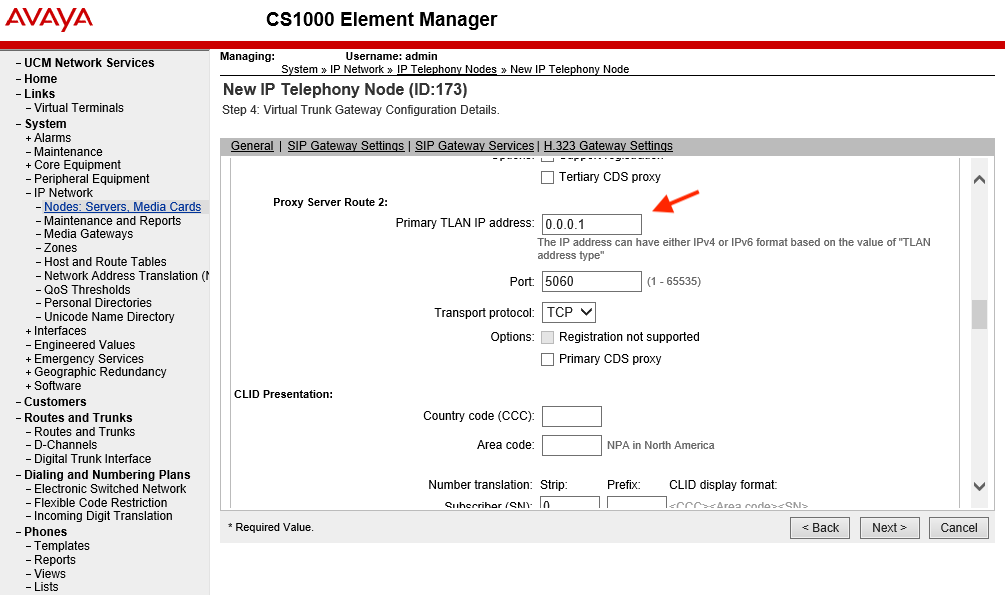
Scroll down to Proxy Server Route 2, enter 0.0.0.1 (important!)
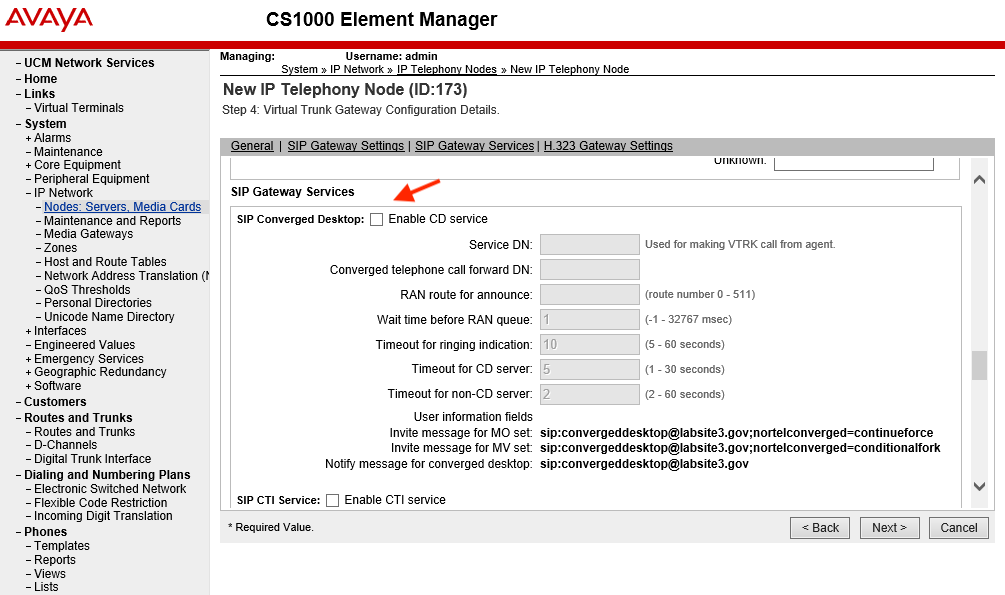
Scroll down to SIP Gateway Services, uncheck SIP Converged Desktop
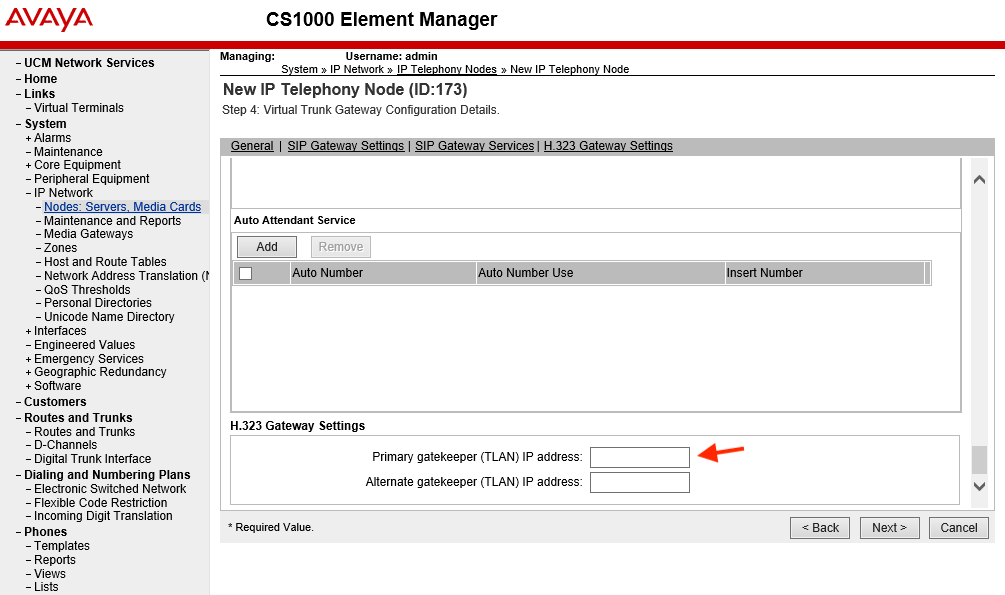
Scroll down to H.323 Gateway Settings: enter Primary and Alternate Gateway TLAN IP addresses (SS0/SS1)
Click NEXT
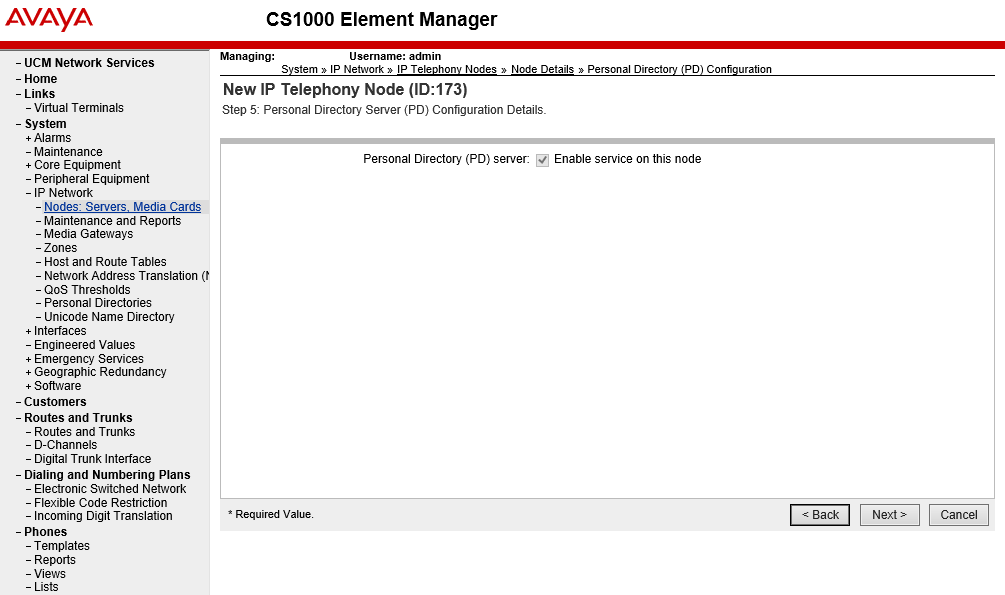
On the Personal Directory screen, click NEXT
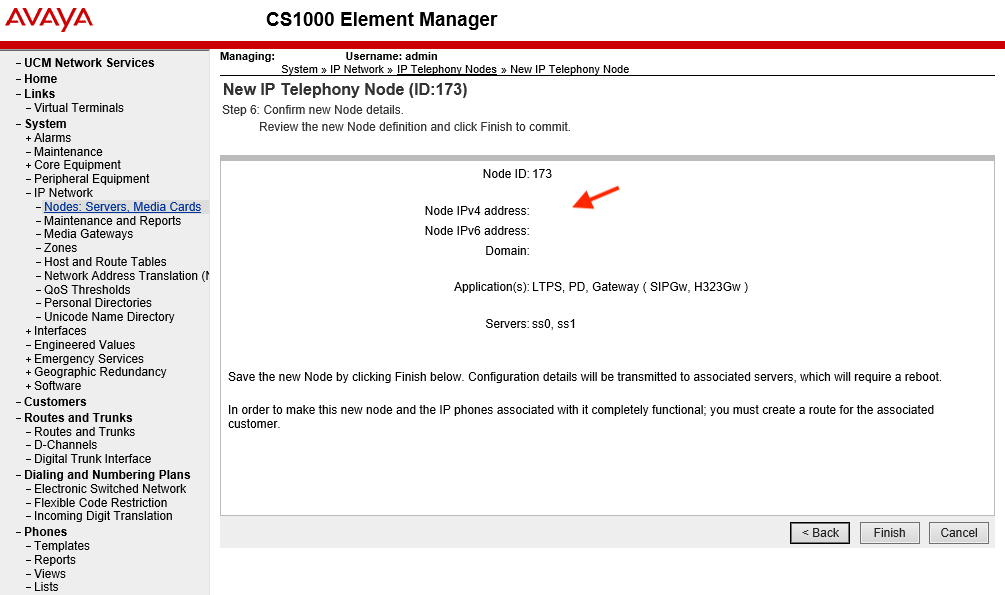
Confirm Node IPv4 address, domain name, and applications.
Click FINISH...
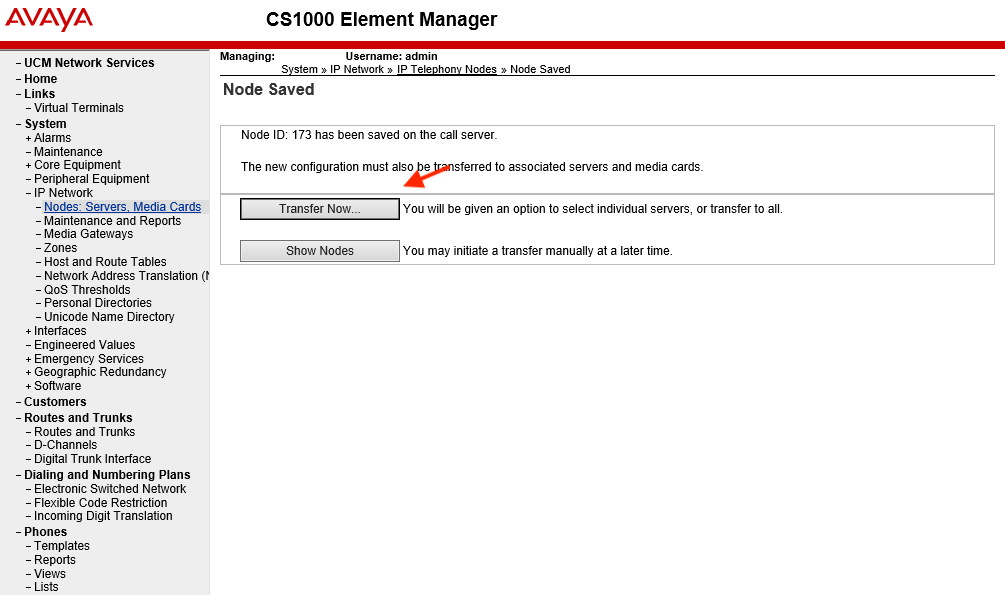
Followed by TRANSFER NOW...
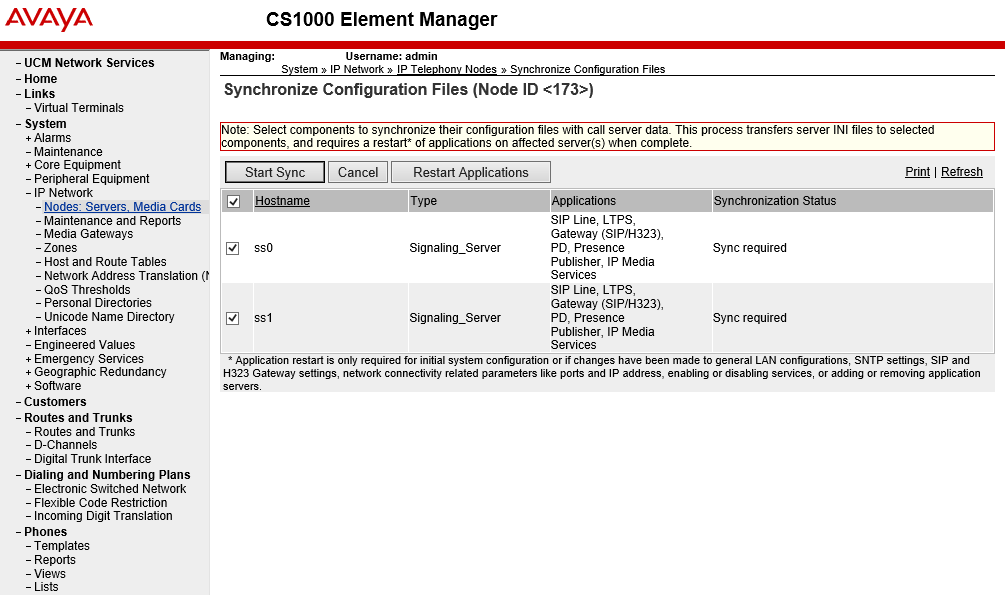
When synchronised, check top box again, and click 'Restart Applications'
Notice the status is 'Sync required'
Be patient, this takes upto 5 mins (have some Cheetos)
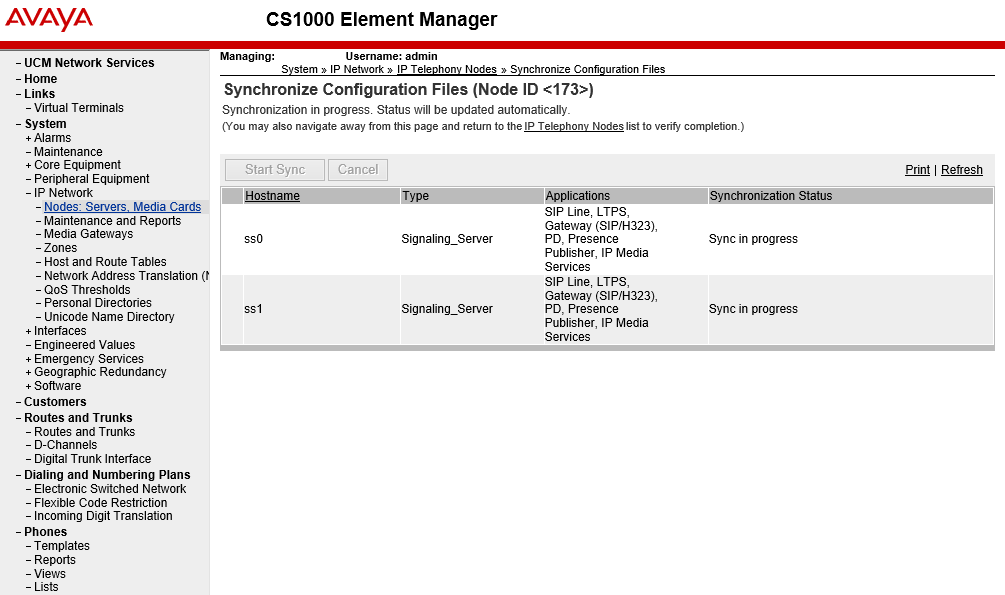
Notice the status is now 'Sync in progress'
On a live system, this is service affecting: all IP phones and trunks will drop!
Notice the status is now 'Synchronised'