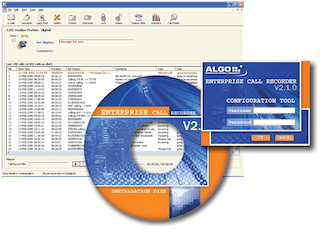
Algo ECR Software v2.1
Installation Procedures

 The ECR software is discontinued. Algo ended hardware & software support Dec. 31, 2015.
This procedure outlines the steps required to upgrade from v2.0.2 to v2.1.0.
New installations should refer to the ECR installation guide for full instructions.
- Software Download:
- ECR v2.1 CDROM (29MB)
Step 1 - Uninstall v2.0.2 ECR Software
- Place the Enterprise Call Recorder (ECR) Installation CD in the CD-ROM drive of the PC chosen to be the ECR Server to begin installation. The installation wizard will start automatically; if it does not, navigate to the CD-ROM drive and run ECR_Install_V2_1_0.exe.
- The installation program will first ask to shutdown the ECR, select Yes.
- The 2.1 Installation program will first prompt to uninstall the previous version of the ECR. Select Yes to process. Note no call records will be deleted in this process.
- Once the un-installation is complete, rerun the 2.1 Installation program. Proceed to the next step.
Step 2 - Install v2.1.0 ECR Software
- Place the Enterprise Call Recorder (ECR) Installation CD in the CD-ROM drive of the PC chosen to be the ECR Server to begin installation. The installation wizard will start automatically; if it does not, navigate to the CD-ROM drive and run ECR_Install_V2_1_0.exe.
- InstallShield will automatically check for Windows Media Encoder. If Windows Media Encoder is detected, InstallShield will go directly to the Installation Package screen. If Windows Media Encoder is not detected, it will be automatically installed.
- Enterprise Call Recorder Installation Type: Choose Server Installation when prompted to select installation type.
- Mapped Drive Support User Information: Leave blank, and click NEXT.
- Program Files Directory: Leave as default, and click NEXT.
- Data Files Directory: Leave as default, and click NEXT.
- Restart the computer when prompted.
Step 3 - Upgrade Recorder Firmware
Firmware update file (HEX) location: C:\Program Files\AuxBox\V2.1\Firmware\4102
- Login into the ECR Configuration Tool (Icon on Desktop).
Username: admin , Password: admin
- Select Tools ➤ AuxBox Maintenance.
- Select Yes when prompted to Shutdown recording system.
- Right click on any recorder in the interface and select Upgrade All 4102 AuxBoxes.
- Select auxbox4102-34.hex then click Open.
- Click Done when the upgrade is completed and close the ECR Configuration Tool.
Step 4 - Setup M2250 Console
Configuration of the recorder serial numbers is required for the ECR to recognize the dual recorder M2250 configuration.
- Run the ECR Configuration Tool on the PC with the AuxBox recorders
attached.
Run the AuxBox Maintenance utility from Tools ➤ AuxBox Maintenance. - Select the recorder connected to TN1 on the M2250 and append M2250A to the end of the serial number. Next, select the recorder connected to TN2. Program this recorder with the same serial number as the TN1 recorder, but appended M2250B.
- To create the station, select only the M2250A AuxBox in the Station Wizard. The second AuxBox is automatically paired to this Station. No further configuration of the second recorder is required.