NT5D61 Input/output Disk Unit with CD-ROM (IODU/C)
This procedure describes how to replace a faulty IODU/C card (Input/Output Disk Unit with CD-ROM).
- Before proceeding, backup the customer database:
LD 43,EDD - DATADUMP COMPLETE is displayed when successfully completed.
CAUTION! If the data dump is not successful, do not continue!
The following NTP's cover this task in full detail:
Try reseating the NT5D61 first!:
You might be lucky, and a reseat is all that's required.
Switch cores (if necessary) to work on the inactive side: LD 135, SCPU
LD 137
STAT
DIS CMDU x
DIS IOP x
 → Set ENB/DIS switch to DIS
 → Remove, count to 10, reseat IODU/C
 → Set ENB/DIS switch to ENL
ENL CMDU x
ENL IOP x
STAT
If the problem returns, continue with the replacement procedure...
Accessing the cores:
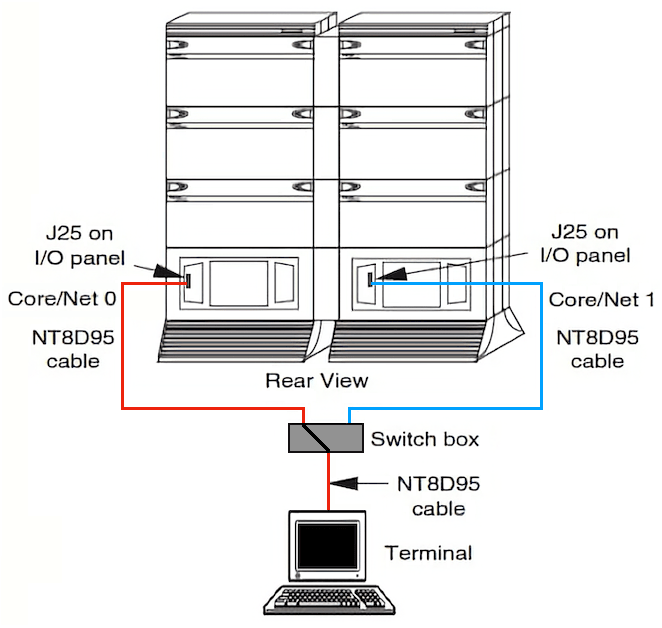
1. To access the Core during the replacement procedure, connect a terminal to the J25 port on the rear I/O panel in the inactive Core Module or Core/Network Module.
2. To communicate with the processor, use the following terminal settings:
- 9600 baud
- 7 data-bits
- space-parity
- 1 stop-bit
- full-duplex
- XON/XOFF
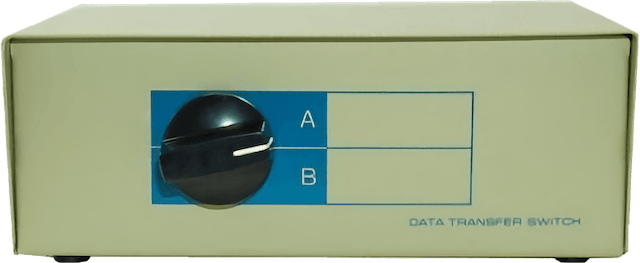
3. If using only one terminal or a switch box, switch the connection from Core to Core as needed.
Splitting the Core:
1. Verify that the disk drives are synchronized:LD 137 STAT - to get the status of the disk drives
If the disks are synchronized, proceed with Step 2. If they are not synchronized, execute the SYNC command:
SYNC        - Synchronize the drives
****        - Exit the program
2. Verify that the clock controller associated with the faulty IODU/C is inactive.
If it is not, switch clock controllers:
LD 60
SSCK        - Get the status of the clock controllers
SWCK        - Switch clock controllers (if necessary)
****        - Exit the program
3. Verify that the IODU/C card being replaced is on the inactive Core:
LD 135
STAT CPU    - Check CPU status
TEST CPU    - Test the CPU
If the IODU/C card being replaced is on the inactive Core, proceed with step 5. If the IODU/C being replaced is not on the inactive Core, swap Cores and verify again:
SCPU        - to swap CPUs
STAT CPU    - to check CPU status
4. Verify that the faulty IODU/C card is inactive. It may be necessary to switch IODU/Cs.
LD 137
STAT        - Get the status of IODU/C
SWAP        - Switch IODU/Cs (if necessary)
5. Set the MAINT/NORM switch on the CP card to MAINT on the active Core.
6. Set the ENB/DIS switch on all CNI cards to DIS on the inactive Core.
7. Perform the following three steps in uninterrupted sequence:
a. Press and hold the MAN RST button on the CP card in the inactive Core.
b. Set the MAINT/NORM switch on the CP card in the inactive Core to MAINT.
c. Release the MAN RST button.
Replacing the IODU/C card in a redundant system:
1. Set the ENB/DIS switch on the faulty IODU/C card to DIS.
2. Unhook the locking devices and remove the IODU/C card.
3. Remove the round 1/2" diameter IODU/C Security Device from the black round Security Device holder on the top right corner of the IODU/C card being replaced.
4. Put the IODU/C card being replaced into a static bag and box.
5. With the Nortel side facing upward, slide the Security Device between the security device holder and the holder clip in the new IODU/C card. Do not bend the clip more than necessary when inserting the Security Device. Ensure that the Security Device is securely in place.
6. Insert the new IODU/C card into the following slots: For NT5D21 Core/Net Modules, insert the IODU/C card in slots 17,18, and 19.
7. Lock the locking devices by pushing them gently towards the faceplate. Set the ENB/DIS switch to ENB.
A blinking letter "E" and number "5" displayed indicates that a failure occurred. In that case, reseat the Security Device in its holder and reinsert the card.
8. Press the MAN RST button on the CP card.
Once the keycode is validated against the Security Device, the Install menu is displayed.
9. At the Install menu, select <o> to copy the software from the active Core.
10. Select <a> to confirm.
11. Select <a> to confirm the software release to be copied.
12. When the software is installed successfully, press <CR> to install CP-software from the hard disk to Flash EEPROM, and install CP-BOOT ROM. Follow the screen directions until the Main Menu returns.
13. When the Main Menu returns, select <f> to install IOP-ROM.
14. Select <a> to continue with the IOP-ROM upgrade
15. At the Install Menu, select the following options in sequence to copy the customer database from the redundant disk.
<d> to go to the Database menu
<d> to copy the database from the redundant disk
<y> to confirm installation status summary
<a> to confirm database copy
16. Remove the diskette from the IODU/C card and select <q> to quit and reload the system.
17. Select <y> to confirm quit
18. Select <a> to reboot the system.
The system automatically performs a sysload and system initialization during which several messages appear on the system terminal. Wait until initialization has finished (INI messages are no longer displayed on the system terminal) before continuing.
19. In the inactive Core, enable the NT6D65 CNI cards by setting the ENB/DIS faceplate switches to ENB.
20. In the inactive Core, perform the following steps in uninterrupted sequence:
a. press and release the MAN RST button
b. when SYS700 messages appear on CP LCD display, set the MAINT/NORM switch to NORM.
Within 60 seconds, the LCD displays the following messages, confirming the process.
RUNNING ROM OS

ENTERING CP VOTE
An HWI534 message from the CPSI or SDI port indicates the start of memory synchronization. Within 10 minutes, an HWI533 message on the inactive Core CPSI or SDI TTY indicates the memory synchronization is taking place. Wait until the memory synchronization is complete.
21. Switch the NORM/MAINT switch on the active CP card to NORM.
22. Synchronize the disk drives:
LD 137
SYNC        - Synchronize the drives, this may take up to 50 minutes
****        - Exit the program

