Mac's and serial TTY's
Mac's are excellent tools for accessing serial device TTY ports (to console into PBX's, switches, and routers). You just need a serial to USB adapter, the right driver, and some Terminal software. You can use screen, although Minicom (or a GUI program) offer more features and functionality.
Drivers:

Most Serial-to-USB adapters will work on a Mac with one of the following OS X drivers...
UPDATE: Mavericks (10.9) includes a driver for FTDI-based Serial-to-USB adapters.
➤ Prolific PL2303: PL2303_MacOSX_1_6_0.zip ➤ FTDI USB Serial: FTDIUSBSerialDriver_v2_3.zip NOTE: It may be necessary to remove any previous driver before installing a newer one,
eg:$ sudo rm -rf /System/Library/Extensions/ProlificUsbSerial.kext
If your adapter doesn't work with either of these, try the following sources:
- Silicon Labs - CP210x USB to UART Bridge Virtual COM Port (VCP) drivers.
- Belkin - USB Serial Adapters: F5U257, F5U103, F5U003 (poor OS X support).
- Keyspan serial-USB adapter drivers can be found in their Support Section.
After installing the correct driver, plug in your USB-Serial adapter, and open a Terminal session (Applications/Utilities).
Enter the command ls /dev/cu.*, and look for something like usbserial (or similar):
$ ls /dev/cu.*
/dev/cu.Bluetooth-Modem		/dev/cu.iPhone-WirelessiAP
/dev/cu.Bluetooth-PDA-Sync	/dev/cu.usbserial
This indicates the USB-Serial driver is working. Select this port name in a terminal program.
You might notice that each serial device shows up twice in /dev, once as a tty.* and once as a cu.*. So, what's the difference? Well, TTY devices are for calling into UNIX systems, whereas CU (Call-Up) devices are for calling out from them (eg, modems). We want to call-out from our Mac, so /dev/cu.* is the correct device to use.
The technical difference is that /dev/tty.* devices will wait (or listen) for DCD (data-carrier-detect), eg, someone calling in, before responding. /dev/cu.* devices do not assert DCD, so they will always connect (respond or succeed) immediately.
Software:
Having installed the right driver, our USB-Serial adapter will show up in /dev/cu.* (shown above). We now need to install some terminal emulation software before we can connect to anything.
- Two terminal methods are Screen and Minicom
- For a GUI solution, see OS X Serial Port Apps
Note: If you can't find a driver for your adapter (eg, Belkin), try Serial which has built-in support for many USB-Serial devices.
Screen
It's not actually necessary to download an install extra software, as you can use the Mac OS X built in Terminal and screen. Screen lacks some features, but it does include VT100/ANSI terminal emulation, and can be extremely useful.
- Open an OS X terminal session (window)
- Find the right TTY device. Type:
ls /dev/cu.* - Then type:
screen /dev/cu.usbserial 9600(in this example). - To quit the screen app, type CTRL-A, then CTRL-\.
With the USB-Serial adapter plugged in, you'll get a list, including something like this:
$ ls /dev/cu.*
/dev/cu.Bluetooth-Modem		/dev/cu.iPhone-WirelessiAP
/dev/cu.Bluetooth-PDA-Sync	/dev/cu.usbserial
The 9600 at the end is the baud rate. You can use any standard rate,
eg, 9600, or 19200 for a Sig Server!
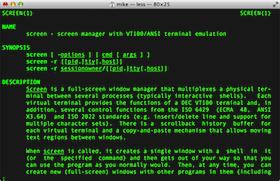
Type man screen in Terminal for further information on screen. (use 'enter' or 'space' to scroll, and 'q' to quit).
Minicom
Alternatively, if you'd like a few more features, and a retro feel, you can install minicom 2.2 ![]() .
.
Minicom supports VT100 emulation, which means it sorta kinda works with Meridian Mail (Function keys: fn + f-key).
- Download and run the minicom 2.2 package installer.
- Then manually edit your $PATH with
sudo nano /private/etc/paths. - Add the following line to the bottom of the file:
/opt/minicom/2.2/bin, save and exit - then relaunch the terminal.
Run minicom -s first to configure your serial interface device name, and other options.
Then, Save setup as dfl (default) and Exit.
Your serial interface device name is found with ls /dev/cu.* (as shown above).
Always launch minicom, with your selected serial adapter plugged in and available to avoid an error.
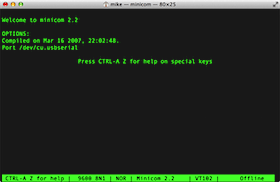
In the example below, the serial device is /dev/cu.usbserial:
In minicom, commands can be called by CTRL-A <key>, for example, change your serial port settings with CTRL-A P
Press CTRL-A Z for a Command Summary, and help on special keys. Enter CTRL-A X to quit.
HINT: Change your OS X terminal window size to 80x25 (1 line more) so you can see the bottom Minicom status bar.
(Terminal Preferences ► Settings ► Window). Open a new window for this change to take effect.

Note, the minicom installer creates /opt, and its not hidden in the OS X finder. Rectify this with: sudo chflags hidden /opt
Connecting
With handshaking set to software (xon/xoff) or none, which covers most devices, serial data communication needs just 3 wires: RXD (2), TXD (3), and GND (5). Generally, hitting <enter> should cause a response, or <ctrl-r> should 're-draw' the screen. If you don't get any characters, try adding a Null-Modem cable or adapter, which swaps RXD and TXD (pins 2 and 3). Signal ground is Pin 5 in a DB-9, or Pin 7 in a DB-25.
| Data | ||
|---|---|---|
| TXD | (3) | Serial Data Output |
| RXD | (2) | Serial Data Input |
| GND | (5) | Signal Ground |
| Other | ||
| RI | (9) | Ring Indicator |
| Handshake | ||
|---|---|---|
| RTS | (7) | Request to Send |
| CTS | (8) | Clear to Send |
| DSR | (6) | Data Set Ready |
| DCD | (1) | Data Carrier Detect |
| DTR | (4) | Data Terminal Ready |
| DB-9 Male |
|---|
 Front (pin) view |


